Step by step guide to set up printing and scanning on Windows
This is a step-by step guide to add the new SHARP printers to your Windows computer.
You will also need a username (which will be the part of your email address before the @wigner.mta.hu) and a password (obtained from gazdadmin@wigner.mta.hu. You will also need either your entry card or a PIN code to use the printer. Note that the password and the PIN codes are not the same!
We shall start by mapping the shared folder on the server to your computer, as drive M:
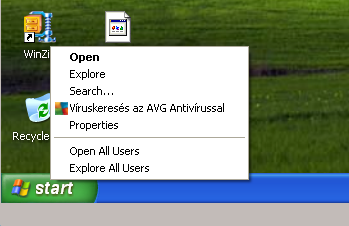
First, right click the Start Menu, and select Explore!
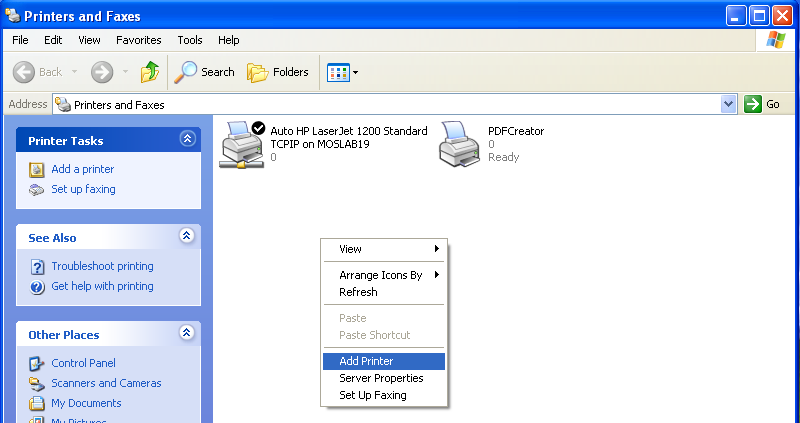
Add Printer!
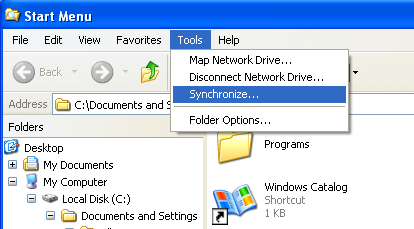
Go to the Tools menu, and select Map Network Drive!
Select a drive letter (e.g., M:), and enter
as the Folder name. Replace printer.uname with your username (the part of your email address before @wigner.mta.hu). When prompted for a password, use the one given to you by the system administrator of the Financial Department, and not the PIN code.\\148.6.176.180\Szkenner$\printer.uname
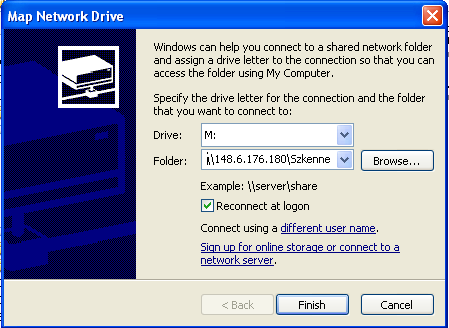 We are now ready with creating the new network drive (M: in the above example). You can scan documents to this drive with the new copier.
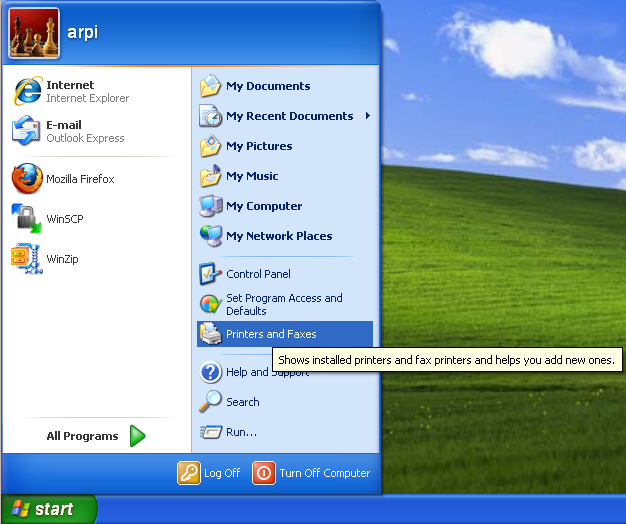
Go back to the Start Menu, and select Printers and faxes. On Windows 7, this item is called Devices.
Right click the background in the Printers and Faxes window, and select Add Printer!
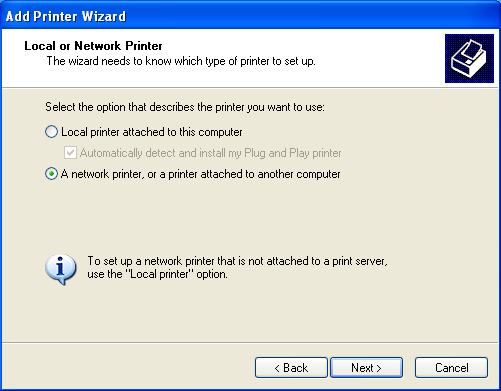
In the Add Printer Wizard, select A network printer, or a printer connected to another computer, then click Next!
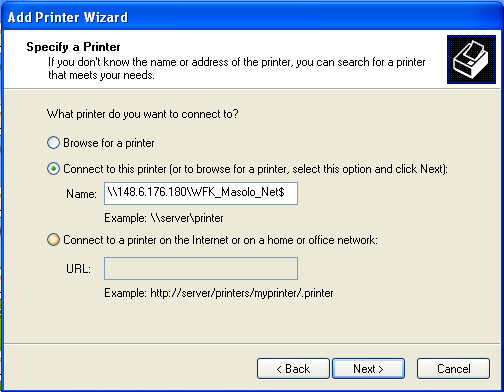
Select Connect to this printer..., and enter
in the Name box.\\148.6.176.180\WFK_Masolo_Net$
Please do not print a test page. It should work now.